Let’s Get Mapping!
Another very useful feature in Windows Live Writer is the Map feature. This allows you to add a map to your blog in order to show your readers exactly where you are blogging about if a destination is mentioned in your post. Perhaps you are blogging about a day trip out, or somewhere that you recently visited. A holiday destination perhaps, or just your home town. It can really enhance the story for your readers if they can see a map or birds eye view of exactly where you are posting about or the spot where you took a photo during your visit there.
Once you have composed your story or post, decide whereabouts you would like your map to be placed. I usually place mine either at the top of my post (almost like a header) or alternatively alongside the text that mentions that particular destination. So let’s insert a Map.
 1. Click on the Map icon in the Insert list. A Bing Map window of the world will then open.
2. Type in the area or destination into the search box at the top of the world map and then click on the search icon. Your chosen destination will appear in the default road view. You can now choose which map view you prefer, a road view, an aerial view or my personal favourite a birds eye view.
3. Next you need to decide whereabouts to place your Map in your post and in exactly the same way as pictures you can place it to the left, right or centre of your text. You can also enlarge it by ‘dragging’ either of the corner arrows in order to make it smaller or larger, or alternatively by dragging on the centre arrows to make it wider or taller.
4. Once you are completely happy with the placement and size of your inserted map, you can add a caption to it. Just click on it to make the Map menu appear in the right hand column and then add your caption inside the Caption box at the top. Under Options if you click on ‘Customise Map’ you can change it to a different view. You might decide to insert a pushpin in order to illustrate the exact spot where you took a photo or stayed during your visit or holiday. In exactly the same way as I illustrated previously with pictures, you can also add margins to the Map so that your text does not butt right up to the edge of it, making it look so much neater and easier to read. Using the Birds Eye view gives your readers a fantastic view of a place that your blogging about. Take a look at York Minster for example from the air!
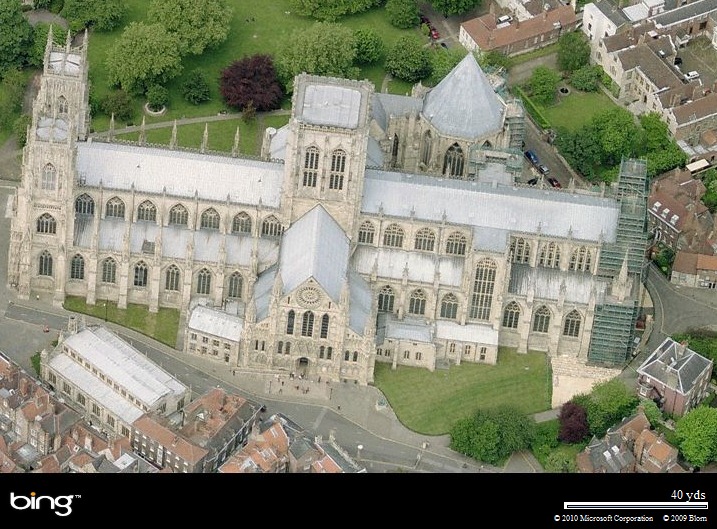
A Birds Eye View
And here’s an Aerial view complete with a pushpin showing exactly where I stood when taking the following photo of York Minster.


York Minster
Next post I will tackle adding a whole photo album to your blog post using either Live Photo Gallery and a SkyDrive account on Windows Live. I’ll also show the different ways that you can choose to display that Photo Album inside your post as well.
TG
No comments:
Post a Comment
Say what you think